Searching for retro games with Xata & Next.js 13
Creating a full-stack web app to search retro games data and prioritize highly-rated games in the results.
Written by
Anjana Vakil
Published on
November 2, 2022
Long ago, in the beautiful kingdom of JavaScript surrounded by cascades and DOM trees... legends told of an omnipotent and omniscient Gaming Power that resided in a hidden app.
It's hidden because you haven't built it yet.
And the time of destiny for Princess Zelda You is drawing near.
In this tutorial we'll build a full-stack web app that allows us to search a collection of retro games data to find the old-school console games of our dreams. And I hope you like adventure - for this will be a treacherous journey through the bleeding edge of recently released web technologies!
We'll learn how to:
- use Xata's serverless platform to store & retrieve data without needing a database
- build an app with React Server & Client Components using Next.js 13 and its
app/directory - implement full-text search with boosting via the Xata SDK
Before we begin, make sure you have Node/npm installed, and download the games.csv data we'll be working with. You can optionally check out the completed tutorial code for reference.
The games may be old, but the tech is brand spankin' new - so let's play!
My friend & avid retro gamer Sara Vieira had compiled a great collection of retro games data for her awesome site letsplayretro.games, a Next app which already had a ton of great features. But one feature Sara still wished for was full-text search over not just games' names, but all their metadata, with the ability to prioritize (aka "boost") the highest-rated games in the search results.
Since every minute spent coding is one less minute spent playing NES, neither of us wanted to waste a lot of time on making this happen. That's when it dawned on me that I knew of a way to easily implement full-text, boosted search over her tabular data: Xata provides it out of the box!
Xata is a serverless data platform that's new on the Jamstack scene, and aims to make life easier for developers to build full-stack apps need without worrying about the details of a scalable, performant backend database. Let's give it a whirl.
Sign up for a free account at xata.io to get started.
Then, from the command line install the CLI and authenticate with your Xata account:
npm i --location=global @xata.io/cli
xata auth loginNow we need to get our games data into Xata. Sara gave us a file games.csv with information about 7.3K games, and conveniently Xata offers a CSV importer that lets us create a database table from that file, with an automatically-inferred schema.
Import the file with the following command. Xata will ask you to set up a new workspace & database (I called my database retrogames but you can name yours as you please), then create a new table in that database named games:
xata import csv games.csv --table=gamesNow let's take a look at our data in Xata's web interface.
Open your newly-created database in your browser with the command:
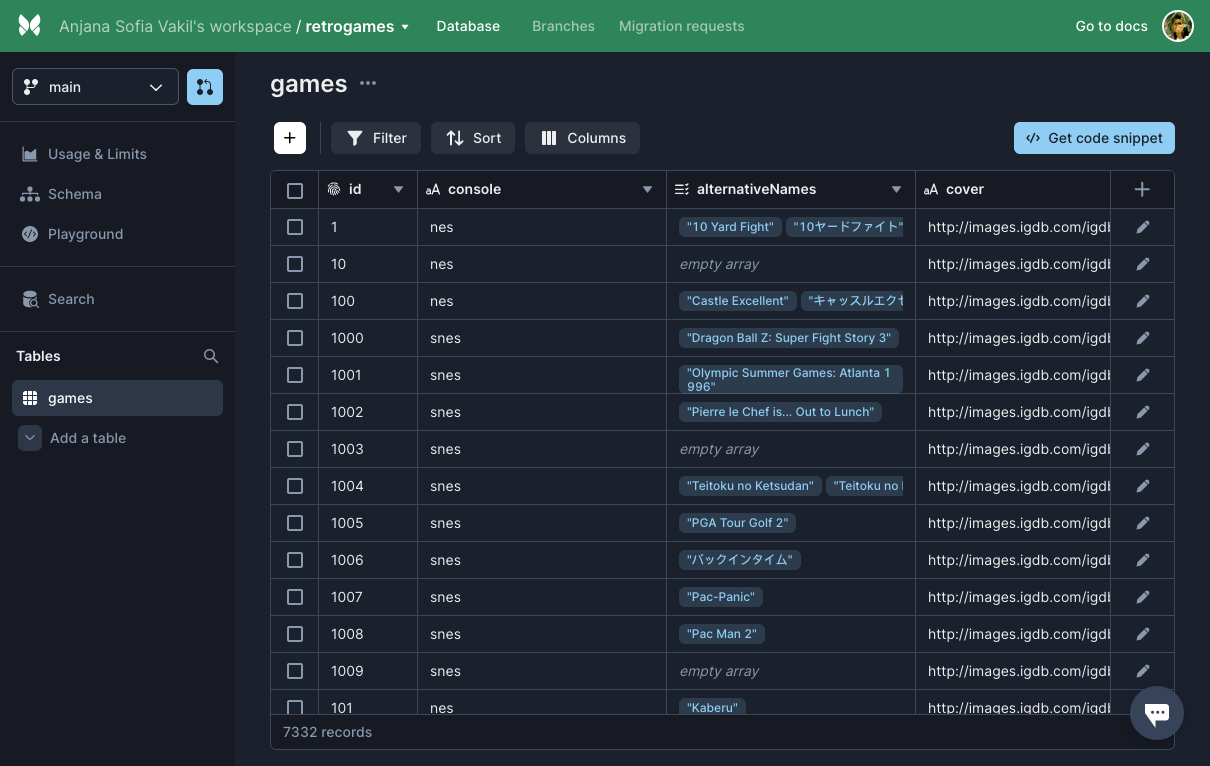
xata browseThis brings us to a spreadsheet-like view of our games data in the Xata dashboard. We can use the dashboard to browse, query, edit, and search our data, view and edit our databases, tables and schemas, and more.
For our app's purposes, these columns of the data are going to be particularly useful:
id: the game's unique ID in the databasename: the game's nametotalRating: the game's average rating on IGDBcover: URL of the game's cover image
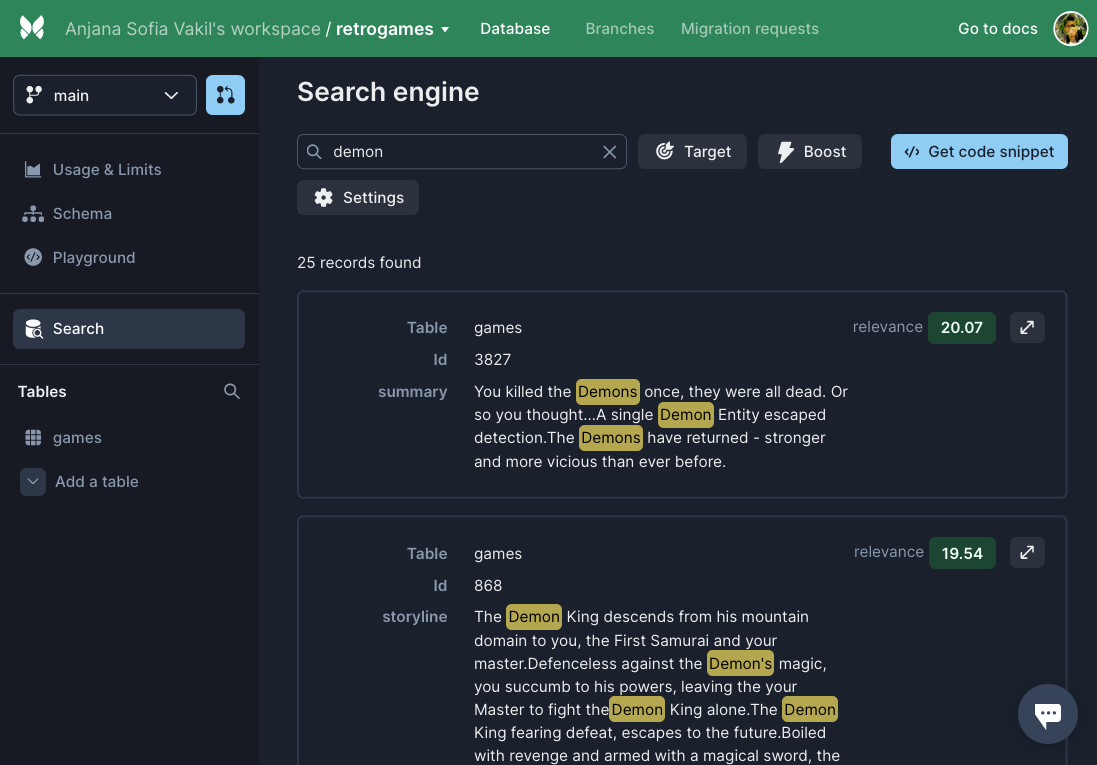
The "Search" tab lets us try out Xata's built-in full-text search capabilities. Whatever search term we enter will be matched against any of the text-based columns in our database; each result is assigned a relevance score, with most relevant results appearing first.
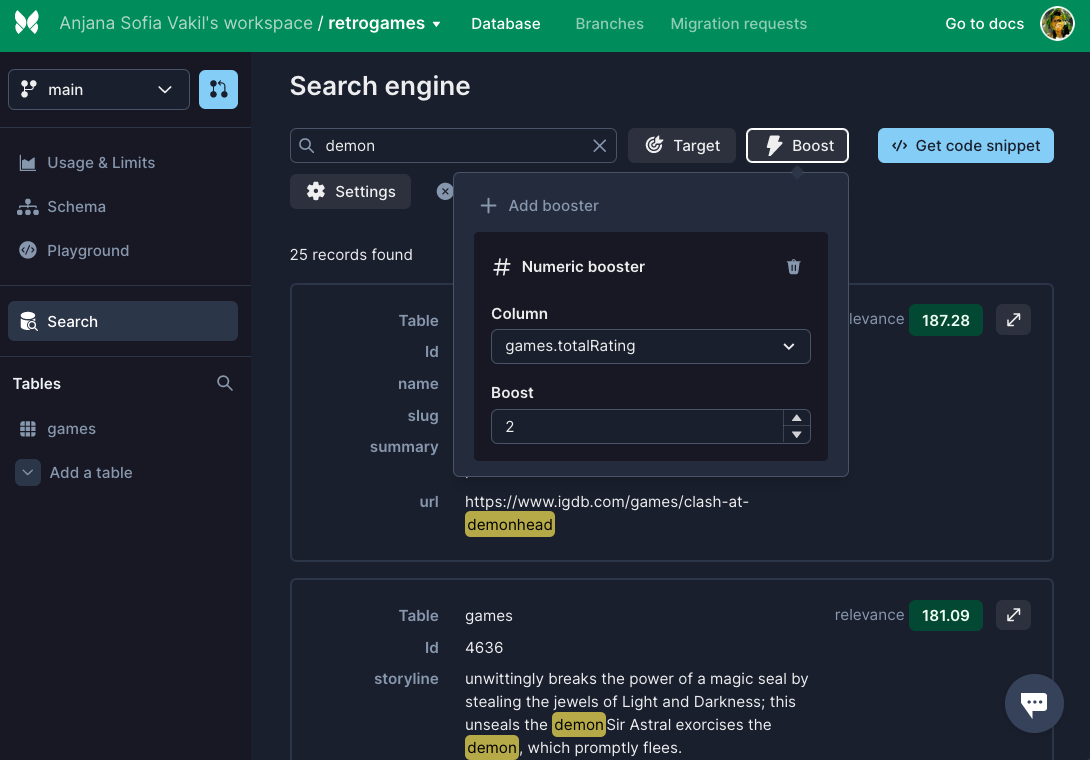
Using Xata's "Boost" feature, we can increase the relevance score of certain results by telling Xata which information we care most about. For example, we can add a numeric booster based on totalRating to have the highest-rated games appear higher in the search results.
To deliver this awesome, customized search experience to our users, we'll use Xata's SDK to interact with our database from our app. On the Search page in the dashboard, click "Get code snippet" to reveal the SDK code for performing that search, including any boosters applied:
// Generated with CLI
import { getXataClient } from './xata';
const xata = getXataClient();

const records = await xata.search.all('demon', {
  tables: [
    {
      table: 'games',
      boosters: [{ numericBooster: { column: 'totalRating', factor: 2 } }]
    }
  ],
  fuzziness: 0,
  prefix: 'phrase'
});

console.log(records);
We'll use this code later to search our Xata data from our web app. But that app doesn't exist yet, so first we'll need to create it!
Because life is full of contradictions, we're going to serve up our super vintage games data with the newest, most cutting-edge fullstack web framework we know: Next.js 13, which is only about a week old at the time of writing.
Next.js is beloved by React developers for its server-side rendering capabilities, which make apps more performant by letting us pre-load data and render React components on the server when we can, rather sending all that JS over the wire and making the client to do the heavy lifting on each request.
With v13 and its experimental app/ directory, Next is now changing up the way we think about architecting & fetching data in Next apps, prioritizing server-side rendering as default via React Server Components, while still allowing us to write hook-based Client Components when we need them.
The Next and React features this new architecture is based on are still experimental and may change, but it's worth wrapping our heads around the new direction in which the React/Next community is headed - so let's dive in and try them out!
The handy tool create-next-app helps us bootstrap a new Next app, and in the latest version we can try out the experimental new app/ directory.
Back on the command line, create an app with the following command, walking through the prompts to name the project as you please and use TypeScript (or JavaScript if you prefer):
npx create-next-app@latest --experimental-appExploring our newly-created directory, we notice the following structure:
app/
  layout.tsx (or .jsx if using JS)
  page.tsx
pages/
  api/
    hello.ts (or .js)
This represents a partial migration to the new app/ directory architecture, in which app/page.tsx will be rendered at our app's / route, using the default layout app/layout.tsx. However, the new app/ directory doesn't yet support API routes, so we're still using the old structure pages/api/hello.ts to create the API route /api/hello. See the Next.js 13 documentation for more details.
To build our search app, we'll need to write all three of these:
- Server Components
- Client Components
- API routes
In order to fetch the data we'll need for these, we first need to set up the Xata SDK so that our app can talk to the database we created earlier in Xata.
In the new directory created by create-next-app, initialize a Xata project with the command:
xata initIn the prompts that follow, select the database you created earlier, and choose to generate TypeScript code (or JS code with ESM if you chose not to use TS) for the Xata client. This will create a xata.ts file at the path you specify; you can use the default path src/xata.ts or change it to e.g. util/xata.ts as I did.
After running the init script, you'll have a .env file with the environment variables the Xata client needs to run, and a xata.ts file which exports a getXataClient() function we can now use to create a client object that can read our database on Xata.
By default, components in the app/ directory (like app/page.jsx) are Server Components. Server components are great for parts of our app that don't require client-side interactivity.
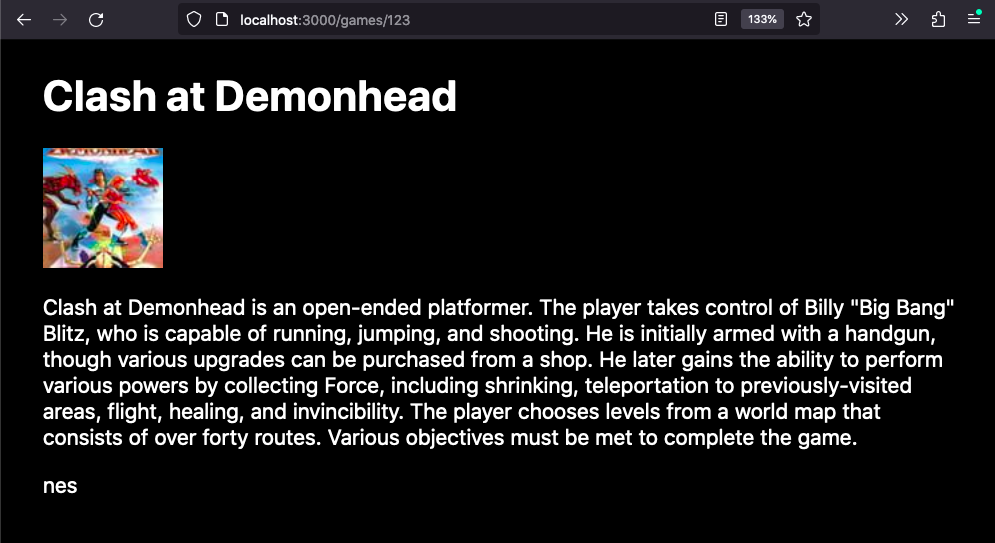
Let's try writing our first server component to load & display data about a certain game. We'll make the route for this page /games/[gameID], where [gameID] is a dynamic route segment matching the ID of a game in our dataset, e.g. /games/123 will show info for "Clash at Demonhead".
To make the new route, create a new file at the path app/games/[gameID]/page.tsx. Now, we need to flesh out that file to load data from Xata into a Server Component.
In the new page.tsx file, import & call getXataClient() to instantiate a new Xata client:
// app/games/[gameID]/page.tsx

import { getXataClient } from '../../../util/xata'; // or the path you chose during 'xata init'

const xata = getXataClient();
Now, we can query our data with the Xata SDK by calling methods on xata.db[tableName], in our case xata.db.games.
To retrieve a game by its ID, for example, we can use .read():
const clashAtDemonhead = await xata.db.games.read('123');Unlike with previous versions of Next, when fetching data in app/ Server Components we don't need anything fancy tricks like getServerSideProps. We can await our data-fetching functions like we would anywhere else!
In page.tsx, export a Page() function that captures the ID from our dynamic gameID route segment from the params object passed in by Next, and passes that ID to the call to .read(). We can then use properties of the game record, e.g. its name, cover image, summary text and console, to render a basic page:
// app/games/[gameID]/page.tsx

import { getXataClient } from '../../../util/xata'; // or the path you chose during 'xata init'

const xata = getXataClient();

export default async function Page({ params }: { params: { gameID: string } }) {
  const game = await xata.db.games.read(params.gameID);

  if (!game) return <h1>Game not found</h1>;

  return (
    <main style={{ padding: '0px 2rem' }}>
      <h1>{game.name}</h1>
      {game.cover && <img src={game.cover} />}
      <p>{game.summary}</p>
      <p>{game.console}</p>
    </main>
  );
}
To see the new page in action, start up a local Next server with the command:
npm run devThen navigate to localhost:3000/games/123 and behold your beautiful new server-rendered component, which automatically uses the default layout in app/layout.tsx.
Server Components are great for pages that don't require interactivity, like our game-info page, because they can be more performantly rendered server-side. But what we really wanted in this app was a search page that dynamically loads data based on user input; for that, we're going to need a Client Component.
Client Components are what we might think of as "traditional" React components that allow us to power client-side interactions with hooks like useState(). Now that the app/ directory makes Server Components the default, we have to explicitly designate our Client Components with the 'use client'; directive.
Create a new Search Client Component by creating a new file app/search.tsx with 'use client'; on the first line and exporting a function called Search() that renders a basic search input:
// app/search.tsx
'use client';

export default function Search() {
  return (
    <div style={{ marginTop: '2rem' }}>
      <input type="search" />
    </div>
  );
}
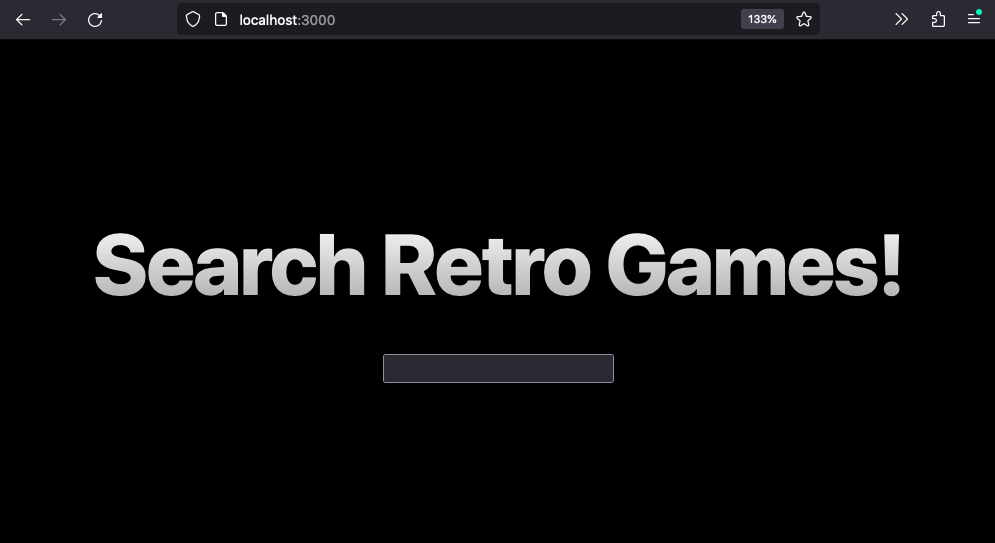
We want this component to show up on our app's home page at the / route, so in app/page.tsx import the Search component and use it to replace the default content in the Home component generated by create-next-app. While you're at it, why not change the page heading to something more fun?
// app/page.tsx
import styles from './page.module.css';
import Search from './search';

export default function Home() {
  return (
    <div className={styles.container}>
      <main className={styles.main}>
        <h1 className={styles.title}>Search Retro Games!</h1>

        <Search />
      </main>
    </div>
  );
}
Navigate to localhost:3000/ and you'll see the Search Client Component successfully rendered within the Home Server Component and default layout!
Now let's capture what the user types into the search input as state, so that we can later use it to dynamically search our Xata database. Editing app/search.tsx, use the useState() React hook to connect the value of the search input to a piece of state called something like searchTerm:
// app/search.tsx

'use client';

import { useState } from 'react';

export default function Search() {
  const [searchTerm, setSearchTerm] = useState('');

  return (
    <div style={{ marginTop: '2rem' }}>
      <input type="search" value={searchTerm} onChange={(e) => setSearchTerm(e.target.value)} />
    </div>
  );
}
Now that we've got a functioning search input connect to our app state, we need to actually send the search terms to Xata to find relevant games!
However, we can't directly call Xata from the client side, because that would potentially expose the secret API key Xata uses to access our database (which we set up during xata auth login and added to our app's .env file during xata init). So we'll need to set up an API route on our server to fetch the data from Xata, and then fetch from that API endpoint from our client component.
The new app/ directory will eventually support API routes, but as of the time of writing it doesn't yet do so. In the meantime, we can still use the old pages/api/ path structure to create API routes that will seamlessly mesh with the routes in our app/ directory. This is showcased by create-next-app with the automatically generated pages/api/hello.ts, which demonstrates how to handle an API request and return a response with JSON data:
// pages/api/hello.ts (generated by create-next-app)

// Next.js API route support: https://nextjs.org/docs/api-routes/introduction
import type { NextApiRequest, NextApiResponse } from 'next';

type Data = {
  name: string;
};

export default function handler(req: NextApiRequest, res: NextApiResponse<Data>) {
  res.status(200).json({ name: 'John Doe' });
}
Let's repurpose this file for the /api/search endpoint we need. Rename the file to pages/api/search.ts and navigate to localhost:3000/api/search to see it returning the dummy "John Doe" data.
Now, we can finally use the xata.search.all(...) code snippet we copied from the Xata dashboard earlier to retrieve data based on a given search term, boosting by the game's rating.
We can use the Next request helper req.query to capture the query parameters of the request, so that we can pass the search term to our endpoint via a term parameter like so: /api/search?term=mario
Each object in the records array returned by xata.search.all() has the shape { table: "games", record: { id, name, console, ... }}, but since we don't need the table name, extract just the record of each object by mapping over the array, and send the resulting array as JSON data in the response.
Your finished search.ts file should look something like this:
// pages/api/search.ts
import type { NextApiRequest, NextApiResponse } from 'next';
import { getXataClient } from '../../util/xata';

// Instantiate the Xata client
const xata = getXataClient();

// Make the function async to await the search data
export default async function handler(req: NextApiRequest, res: NextApiResponse) {
  // Parse the 'term' query parameter from the request
  const term = req.query.term as string;

  // Paste the code snippet copied from the Xata search dashboard
  // passing in the search term from the request
  const records = await xata.search.all(term, {
    tables: [
      {
        table: 'games', // Search the 'games' data
        // Prioritize games with a higher 'totalRating'
        boosters: [{ numericBooster: { column: 'totalRating', factor: 2 } }]
      }
    ],
    fuzziness: 0,
    prefix: 'phrase'
  });

  // Extract the `record` property from the { table, record } objects returned by the search
  res.status(200).json(records.map((r) => r.record));
}
Navigate to your new & improved search endpoint to try out different search terms and verify it's working! For example http://localhost:3000/api/search?term=batman.
Now all that remains is to connect our client side code to the new search API route, so that our users can search games from the UI.
The React and Next teams are working on some big changes to our current patterns for fetching data on the server & client. At the time of writing, these new patterns are quite experimental and not quite at the stage where developers can fully take advantage of them.
As we saw earlier in our games/[gameID]/page.tsx component, we can use await to fetch data in React Server Components, but it isn't supported in Client Components. Instead, React's new use() hook is intended to bring await-like functionality to Client Components, so in the future we should be able to asynchronously fetch data with use() in a Client Component as described in the Next docs and React's promises RFC.
However, at the time of writing, the caching functionality that's a necessary complement to use() has not been fully implemented in React/Next yet, and the intended use() pattern seems to create an infinite loop of rerenders and network requests in our Client Component.
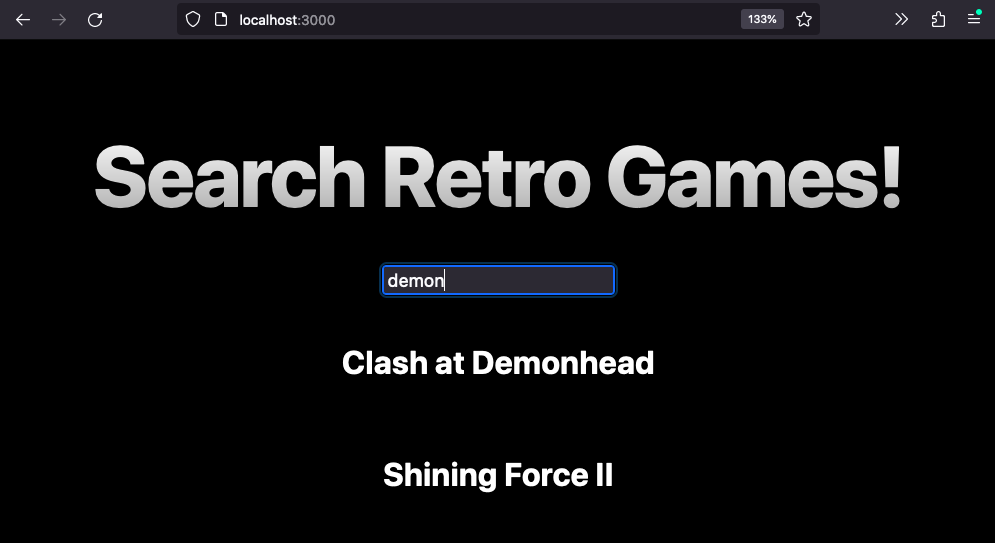
So while we eagerly await (ha!) full use (ha!!) of use(), we still need a way to fetch search results from our API endpoint and use it to render a basic list of games (each linking to its corresponding /games/[gameID] page). For now, we can do this by fetching data within a useEffect() and capturing the results with useState(), like so:
// app/search.tsx

'use client';

import { useEffect, useState } from 'react';
import Link from 'next/link';

// fetch() is not yet supported inside Client Components
// so we wrap it in a utility function
async function getData(term: string) {
  const res = await fetch(`/api/search?term=${term}`);
  return res.json();
}

export default function Search() {
  const [searchTerm, setSearchTerm] = useState(''); // Track the search term
  const [games, setGames] = useState([]); // Track the search results

  useEffect(() => {
    if (searchTerm) {
      // Update the games array once data has loaded
      getData(searchTerm).then((results) => setGames(results));
    } else {
      // Reset games if the search term has been cleared
      setGames([]);
    }
  }, [searchTerm]);

  return (
    <>
      <div style={{ marginTop: '2rem' }}>
        <input type="search" value={searchTerm} onChange={(e) => setSearchTerm(e.target.value)} />
      </div>
      {games.map(({ id, name }) => {
        // Render a basic link to the info page for each game
        return (
          <div key={id} style={{ marginTop: '1rem' }}>
            <Link href={`/games/${id}`}>
              <h2>{name}</h2>
            </Link>
          </div>
        );
      })}
    </>
  );
}
Now our search app, while basic, is complete! Reload the home page at localhost:3000/ and enjoy searching through thousands of retro games.
In the process of building our app to search retro games data, we've covered a lot of ground! We learned how to:
- Import CSV data into Xata
- Set up the Xata SDK in a Next project
- Use the new
app/directory in Next.js 13 - Build React Server and Client components in
app/ - Perform full-text search with boosting via the Xata SDK
- (Almost) use the new
use()hook to fetch data from Client Components
There is still a lot more Xata functionality we haven't had time to explore. Check out search-retro-games.vercel.app for an enhanced version of this project featuring:
- Filtering search results by console
- Aggregating to count the total number of games
- Debounced search input to avoid over-fetching
- More details in search results & game pages
Now let's take a break from all this coding, and go play some retro games!
Thanks very much to Xata for sponsoring this work and to retro gaming queen Sara Vieira for making it possible!
Subscribe to our blog
Join our community of subscribers to stay up to date with the latest news, tips and thought leadership, delivered directly to your inbox.
